For years, I battled with persistently dry, chapped lips. No matter how religiously I applied Vaseline or the latest trendy lip balms, nothing seemed to provide lasting relief. It was a constant cycle of reapplication and disappointment. Sound familiar?
My turning point came when I realised that many of these commercial products were actually exacerbating the problem. The petroleum-based ingredients in Vaseline, for instance, created a barrier that prevented moisture loss but didn’t actually hydrate my lips. Other balms contained artificial fragrances and preservatives that left my lips feeling worse than before.
Fed up with the endless cycle of ineffective products, I decided to take matters into my own hands. Thus began my journey into the world of homemade lip balms. Armed with research and a determination to find a solution, I started experimenting with natural ingredients in my kitchen.
The results were transformative. Not only did I finally achieve the soft, nourished lips I’d been longing for, but I also discovered a new passion. Creating my own lip balms allowed me to control exactly what I was putting on my lips, and the process itself was surprisingly enjoyable and rewarding.
Now, I’m excited to share this knowledge with you. Whether you’re struggling with dry lips like I was, or simply curious about natural skincare alternatives, this guide will walk you through everything you need to know about making your own luscious, nourishing homemade lip balms.
In this article, we’ll explore the benefits of DIY lip care, delve into essential ingredients, and guide you through the process of creating your very own lip balms. From basic recipes to exciting variations, you’ll soon be crafting bespoke balms that put those shop-bought tubes to shame.
So, let’s embark on this delightful journey of lip balm crafting together!
Why Choose Homemade Lip Balms?
The decision to create your own lip balms comes with a multitude of benefits that extend far beyond just moisturised lips. Let’s delve deeper into why homemade lip balms are worth your time and effort:
- Cost-effectiveness: While the initial investment in ingredients might seem substantial, homemade lip balms are incredibly cost-effective in the long run. A single batch can yield multiple tubes or pots, often at a fraction of the cost of high-end commercial balms. Plus, many ingredients are versatile and can be used in other DIY skincare projects.
- Customisation Options: Your lips are unique, and your lip balm should be too. Homemade balms allow for endless customisation. You can adjust the consistency to your liking, experiment with different scents, or even create tinted balms that complement your skin tone. The possibilities are truly limitless.
- Eco-friendly Packaging Choices: By making your own lip balms, you have the power to reduce plastic waste. You can choose to use recyclable tins, glass pots, or even upcycle old containers. Some crafters even create compostable paper tube packaging for a zero-waste option. It’s a small step that can make a big difference for our planet.
- Natural and Organic Formulations: Many commercial lip balms contain petroleum-based ingredients or synthetic compounds. With homemade balms, you can opt for all-natural, organic ingredients. This not only benefits your lips but also aligns with a more holistic approach to skincare and overall health.
- Therapeutic Benefits: Homemade lip balms can be more than just moisturising. By incorporating ingredients like essential oils or herbal infusions, you can create balms with additional therapeutic properties. For instance, tea tree oil for its antibacterial properties, or calendula for its healing effects.
- Gift-giving Potential: Homemade lip balms make for thoughtful, personalised gifts. You can create custom blends for friends and family, tailoring each batch to the recipient’s preferences or needs. It’s a heartfelt present that shows care and consideration.
- Sense of Accomplishment: Lastly, there’s an undeniable sense of satisfaction in using a product you’ve made yourself. Each application serves as a reminder of your creativity and self-sufficiency.
By choosing to make your own lip balms, you’re not just caring for your lips – you’re embracing a more mindful, sustainable, and personalised approach to skincare. It’s a small change that can have a big impact on both your daily routine and the environment.
Essential Ingredients for Homemade Lip Balms
Creating your own lip balms requires a careful balance of ingredients to achieve the perfect texture, moisturising properties, and staying power. Let’s explore the key components in detail:
- Base Oils: These form the foundation of your lip balm, providing moisture and nourishment. Some popular options include:
- Coconut Oil: Known for its moisturising properties and subtle tropical scent. It’s solid at room temperature but melts easily on contact with skin.
- Sweet Almond Oil: Rich in vitamin E, this oil is lightweight and absorbs quickly, making it ideal for lip care.
- Jojoba Oil: Similar in composition to our skin’s natural sebum, jojoba oil is deeply moisturising and has a long shelf life.
- Avocado Oil: Packed with vitamins A, D, and E, this oil is particularly beneficial for dry or chapped lips.
- Butter: These ingredients add richness and create a protective barrier on the lips. Common choices include:
- Shea Butter: Renowned for its moisturising and healing properties, shea butter is rich in vitamins and fatty acids.
- Cocoa Butter: With its chocolatey aroma, cocoa butter is excellent for creating a smooth texture and provides natural UV protection.
- Mango Butter: Lighter than shea butter, mango butter is non-greasy and rich in vitamin C.
- Wax: Wax gives structure to your lip balm and helps it stay on your lips. Options include:
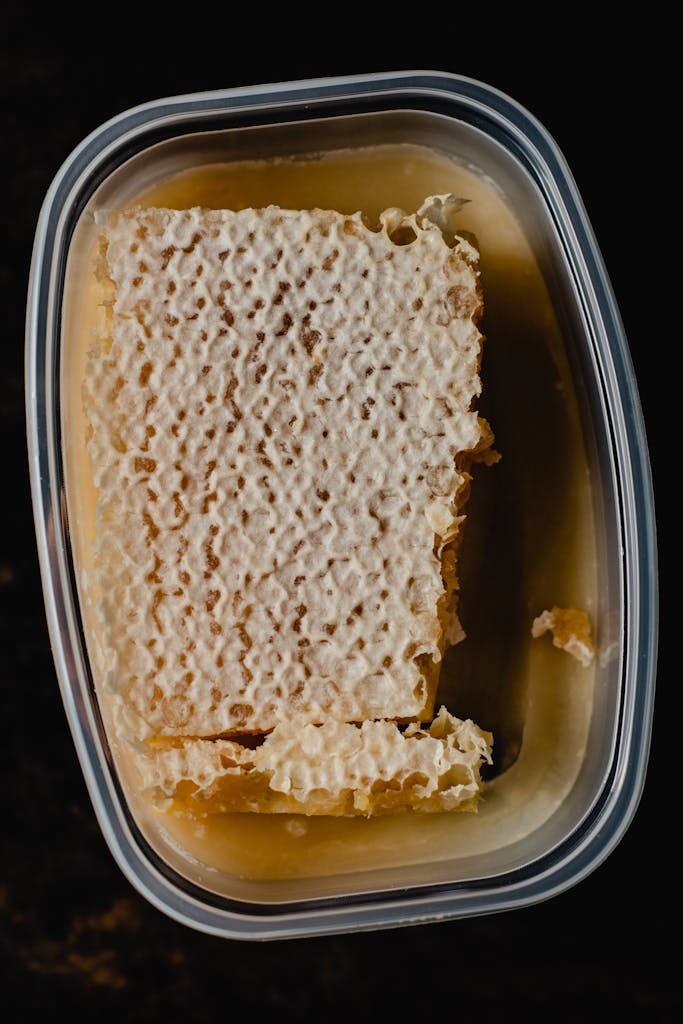
- Beeswax: The most common choice, beeswax provides excellent staying power and a subtle honey scent.
- Candelilla Wax: A vegan alternative to beeswax, it’s harder and requires less in your formulations.
- Carnauba Wax: Another plant-based option, carnauba wax is very hard and gives a glossy finish.
- Optional Additives: These ingredients can enhance your lip balm’s properties or add personal touches:
- Vitamin E Oil: Acts as a natural preservative and provides additional moisturising benefits.
- Essential Oils: Add scent and potential therapeutic properties. Peppermint, lavender, and citrus oils are popular choices.
- Natural Colourants: Ingredients like beetroot powder, cocoa powder, or mica can add a subtle tint.
- Honey: Adds sweetness and has natural antibacterial properties.
- Lanolin: Derived from sheep’s wool, it’s incredibly moisturising but not suitable for vegans.
- SPF Additives: Zinc oxide or titanium dioxide can be added for sun protection, but be cautious with DIY sunscreen.
- Flavour Oils: If you want to add taste without the therapeutic properties of essential oils, flavour oils designed for lip products can be used.
When selecting your ingredients, opt for high-quality, food-grade options whenever possible, as lip balms are likely to be ingested in small amounts. It’s also crucial to consider any personal allergies or sensitivities.
The key to a successful homemade lip balm lies in finding the right balance of these ingredients. Generally, a basic ratio to start with is:
- 1 part wax
- 2 part butter
- 2 parts oil
From this basic formula, you can adjust the quantities to achieve your desired consistency and properties. Remember, creating the perfect lip balm often requires some experimentation, so don’t be afraid to tweak your recipes until you find your ideal blend.
Step-by-Step Guide to Making Homemade Lip Balms
For the novice lip balm maker, the process might seem daunting at first. But fear not! This detailed guide will walk you through each step, ensuring your first foray into lip balm crafting is a success.
What You’ll Need:
- Double boiler (or a heat-safe glass bowl and a saucepan)
- Small jars or lip balm tubes
- Kitchen scale (for precise measurements)
- Stirring utensil (a small whisk or spoon)
- Dropper (for essential oils)
- Small funnel (optional, but helpful for filling tubes)
- Labels (for marking your creations)
Step 1: Prepare Your Workspace- Before you begin, ensure your work area is clean and organised. Lay out all your ingredients and tools. If you’re using containers that aren’t new, sterilise them by washing in hot, soapy water and drying thoroughly.
Step 2: Measure Your Ingredients- Using your kitchen scale, carefully measure out your chosen base oils, butter, and wax. For beginners, start with a simple recipe like:
- 2 tablespoons (30g) coconut oil
- 2 tablespoons (30g) shea butter
- 1 tablespoon (15g) beeswax pellets
Step 3: Melt the Ingredients, If using a double boiler: a. Fill the bottom pan with a few inches of water. b. Place your measured ingredients in the top pan. c. Heat over medium-low heat, stirring gently.
If using a bowl and saucepan: a. Fill the saucepan with a few inches of water. b. Place your glass bowl on top, ensuring it doesn’t touch the water. c. Add your ingredients to the bowl and heat over medium-low, stirring gently.
Continue heating and stirring until all ingredients are fully melted and combined. This usually takes about 5-10 minutes.
Step 4: Remove from Heat- Once everything is melted and well-mixed, carefully remove the top pan or bowl from the heat. Use oven mitts – it will be hot!
Step 5: Add Optional Ingredients- If you’re using any additional ingredients like vitamin E oil or essential oils, now is the time to add them. For essential oils, start with about 5-10 drops per 30g of base ingredients. Stir well to incorporate.
Step 6: Pour into Containers- While the mixture is still liquid, carefully pour it into your prepared containers. If you’re using a lip balm tube, a small funnel can be very helpful here. Fill to just below the rim, as the balm will shrink slightly as it cools.
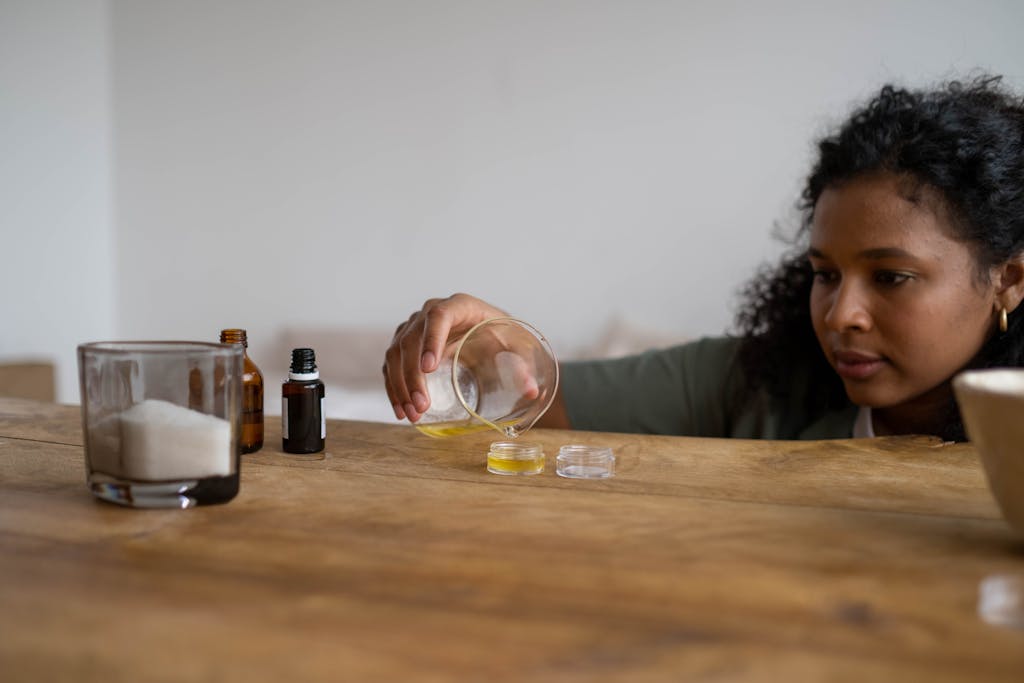
Step 7: Allow to Cool and Solidify- Leave your lip balms to cool at room temperature. This can take anywhere from 1-3 hours depending on the size of your containers. Resist the urge to move them to the fridge, as this can cause condensation and affect the texture.
Step 8: Cap and Label- Once fully cooled and solidified, cap your lip balms. Create labels with the date of manufacture and list of ingredients used.
Step 9: Clean Up- While your balms are cooling, clean your equipment. The easiest way is to wipe everything down with paper towels while the residue is still warm. Then wash with hot, soapy water.
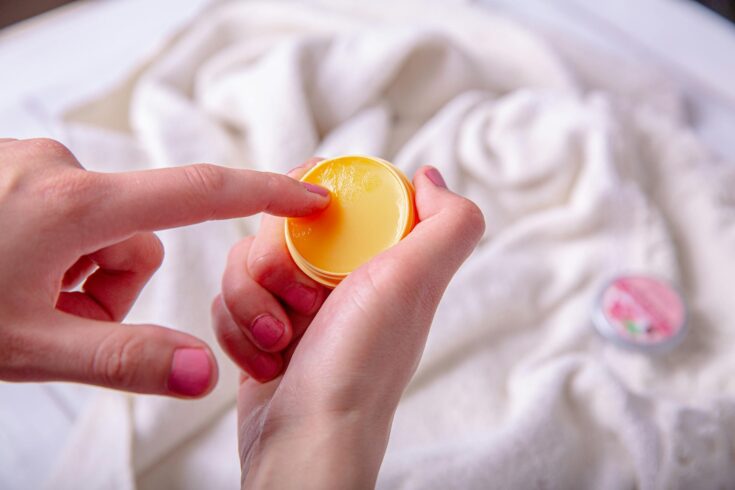
Step 10: Test and Enjoy- Your homemade lip balms are now ready to use! Apply a small amount to your lips and enjoy the fruits of your labour.
Tips for Beginners:
- Start with small batches until you perfect your recipe.
- If your balm is too soft, remelt and add more wax. If it’s too hard, add more oil.
- Keep notes on your recipes and adjustments for future reference.
- Always do a patch test with new ingredients to check for any allergic reactions.
Remember, practice makes perfect. Don’t be discouraged if your first batch isn’t exactly as you imagined – each attempt will bring you closer to your ideal homemade lip balm!
Homemade Lip Balm
For the novice lip balm maker, the process might seem daunting at first. But fear not! This detailed guide will walk you through each step, ensuring your first foray into lip balm crafting is a success.
Materials
- 2 tablespoons (30g) coconut oil
- 2 tablespoons (30g) shea butter
- 1 tablespoon (15g) beeswax pellets
Tools
- Double boiler (or a heat-safe glass bowl and a saucepan)
- Small jars or lip balm tubes
- Kitchen scale (for precise measurements)
- Stirring utensil (a small whisk or spoon)
- Dropper (for essential oils)
- Small funnel (optional, but helpful for filling tubes)
- Labels (for marking your creations)
Instructions
- Prepare Your Workspace: Before you begin, ensure your work area is clean and organised. Lay out all your ingredients and tools. If you're using containers that aren't new, sterilise them by washing in hot, soapy water and drying thoroughly.
- Measure Your Ingredients: Using your kitchen scale, carefully measure out your chosen base oils, butter, and wax.
- Melt the Ingredients, If using a double boiler: a. Fill the bottom pan with a few inches of water. b. Place your measured ingredients in the top pan. c. Heat over medium-low heat, stirring gently. If using a bowl and saucepan: a. Fill the saucepan with a few inches of water. b. Place your glass bowl on top, ensuring it doesn't touch the water. c. Add your ingredients to the bowl and heat over medium-low, stirring gently.
- Continue heating and stirring until all ingredients are fully melted and combined. This usually takes about 5-10 minutes.
- Remove from Heat: Once everything is melted and well-mixed, carefully remove the top pan or bowl from the heat. Use oven mitts – it will be hot!
- Add Optional Ingredients: If you're using any additional ingredients like vitamin E oil or essential oils, now is the time to add them. For essential oils, start with about 5-10 drops per 30g of base ingredients. Stir well to incorporate.
- Pour into Containers: While the mixture is still liquid, carefully pour it into your prepared containers. If you're using a lip balm tube, a small funnel can be very helpful here. Fill to just below the rim, as the balm will shrink slightly as it cools.
- Allow to Cool and Solidify: Leave your lip balms to cool at room temperature. This can take anywhere from 1-3 hours depending on the size of your containers. Resist the urge to move them to the fridge, as this can cause condensation and affect the texture.
- Cap and Label: Once fully cooled and solidified, cap your lip balms. Create labels with the date of manufacture and list of ingredients used.
- Clean Up: While your balms are cooling, clean your equipment. The easiest way is to wipe everything down with paper towels while the residue is still warm. Then wash with hot, soapy water.
- Test and Enjoy: Your homemade lip balms are now ready to use! Apply a small amount to your lips and enjoy the fruits of your labour.
Notes
Tips for Beginners:
- Start with small batches until you perfect your recipe.
- If your balm is too soft, remelt and add more wax. If it's too hard, add more oil.
- Keep notes on your recipes and adjustments for future reference.
- Always do a patch test with new ingredients to check for any allergic reactions.
Remember, practice makes perfect. Don't be discouraged if your first batch isn't exactly as you imagined – each attempt will bring you closer to your ideal homemade lip balm!
So Now You Have Mastered the Basics
Here are some variations on the basic recipe:
Easy Moisturising Lip Balm for Dry Lips
Remember, when using these recipes:
- Always follow the basic method outlined in the step-by-step guide.
- Add essential oils and flavourings after removing the mixture from heat.
- Adjust quantities if needed to achieve your desired consistency.
- Perform a patch test before using new ingredients, especially if you have sensitive skin.
These recipes offer a starting point for creating specialised lip balms. Feel free to experiment and adjust to suit your personal preferences!
From Chapped to Cherished: My Lip Balm Revolution
When I first started this journey, driven by frustration with my persistently dry lips and disappointment in commercial products, I never imagined how transformative it would be. Now, as we reach the end of this guide, I hope you’re feeling as empowered and excited as I was when I first successfully crafted my own lip balm.
We’ve come a long way from those days of relying on petroleum-based products and endlessly reapplying ineffective balms. Together, we’ve explored the myriad benefits of homemade lip balms – from the control over ingredients to the cost-effectiveness and the sheer joy of customisation. Remember how liberating it felt to realise you could avoid those mysterious, unpronounceable ingredients?
We’ve demystified the world of base oils, butters, and waxes. What once seemed like a daunting array of ingredients has become a playground for creativity. You now know the moisturising power of coconut oil, the protective qualities of beeswax, and the nourishing benefits of shea butter. More importantly, you understand how to blend these ingredients to create a balm that’s perfect for your unique lips.
The step-by-step guide we walked through is more than just a recipe – it’s a key to unlocking your DIY potential. From measuring ingredients to the satisfying moment of pouring your creation into its container, each step is a building block in your lip balm crafting journey.
And let’s not forget the exciting variations we explored. Whether you’re craving a vanilla chai flavoured treat, a rose-tinted beauty enhancer, or a soothing calendula balm for sensitive lips, you now have the knowledge to create a lip balm for every mood and need.
As you embark on your own lip balm crafting adventure, remember that this is just the beginning. Each batch you make is an opportunity to refine your skills, experiment with new ingredients, and create something uniquely yours. Don’t be discouraged if your first attempts aren’t perfect – mine certainly weren’t! Each ‘failure’ is just a stepping stone to your perfect formula.
Most importantly, I hope this guide has shown you that taking care of your lips can be a personal, enjoyable, and empowering experience. You’re no longer at the mercy of commercial products that don’t quite meet your needs. Instead, you have the power to create exactly what your lips crave.
So, as you stand at the threshold of your lip balm crafting journey, ingredients at the ready, remember how far you’ve come. From a frustrated consumer to a confident creator, you’re now equipped to revolutionise your lip care routine.
Here’s to saying goodbye to perpetually dry lips, to embracing the satisfaction of DIY success, and to the countless personalised lip balms in your future. Your lips are about to embark on their happiest, most nourished days yet – and it’s all thanks to your newfound skills and creativity.
Happy crafting, and may your lips never know dryness again!

